How to Ride a Kick Scooter – 5 Easy Steps
Are you pondering, sinking some dollars into a kick scooter for hauling that vehicle around? Or a brand new sleek kick scooter has just reached your doorstep, and you’re wondering, “How to ride a kick scooter?” Don’t worry; riding a kick scooter is fun, and you’ll get the hang of it with little practice.
In this kick scooter riding guide, we’ll walk through some important tips to ride a kick scooter for the first time, along with the complete riding procedure, starting from identifying the dominant foot to gliding posture. So, let’s dive in right away!
Pro Tips To Ride a Kick Scooter
Before you start commuting or doing tricks with a push scooter, it’s worth considering a few tips that can assist you in riding like a pro, irrespective of your skill level. Some of the basic tips are discussed below.
- Always try to hold the handlebar with a loose grip. A tight grip will be uncomfortable and make you tired and accident-prone while riding for a long time.
- During the learning phase, keep your pushes short and sharp. Relaxing, short, and deep kicks will assist you in gaining momentum and riding for a longer time without getting fatigued.
- If you’re a beginner, then practice riding on flat surfaces with little to no hindrance. It’ll boost your confidence and make you able to perform tricks in a skatepark.
How to Ride a Kick Scooter for the First Time – 5 Easy Steps
Riding the kick scooter isn’t hard at all. As a beginner or even a child, you can get around it in just a few hours. When riding the scooter for the first time, you must consider the 5 easy steps. These can improve your scooting technique and make your riding safe and enjoyable. Now, let’s uncover each step and how to perform it correctly!
Identify the Balancing Leg and Dominant Foot.
Identification of the dominant foot and balancing leg (also called the master leg) is the first step to diving into the riding fun. A master leg is one that can better bear your weight and balance a cut above the other. If you aren’t sure about one, try one-leg hopping. It’ll assist you in identifying your balancing leg. This leg basically stands on the deck of the scooter while riding, while the other leg (action leg) pushes off and brakes.
The next thing you must consider is to identify the dominant foot, the one that pushes off the kick scooter. In the majority of cases, the right foot is dominant, and if you’re a right-footed dominant rider, you’ll ride the scooter in a regular stance. But if you’re goofy-footed (left foot dominant), you’ll ride in the goofy stance.
Stepping On.
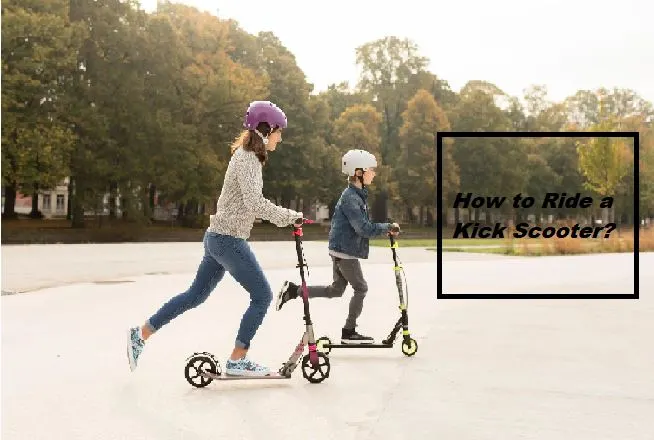
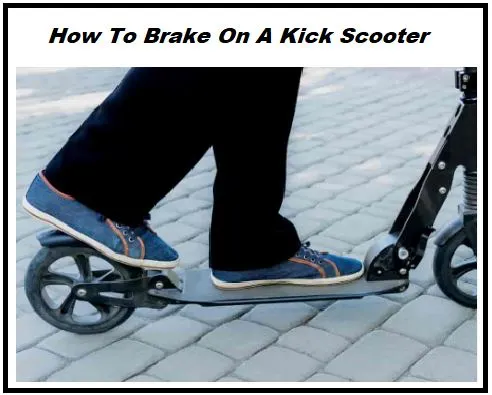
Now you’ve your push scooter on its 2 large wheels. Stand with the scooter facing the same direction as the scooter. Make sure you stand in such a way that the scooter and the master leg are parallel to each other. Now, hold the handlebars securely and keep your arms bent outward. Step on the deck with your balancing leg.
Try to position the foot at the center of the deck width-wise and as close to the front of the deck as possible, pointing it towards the direction of motion. Your toes must be about touching (so close) to the front of the deck. It would be best if you bent your knees as you hop the scooter. The dominant foot is still on the ground, closer to the deck to its possible extent, about touching the scooter’s side.
Pushing Off
When you’re done with stepping on the deck, direct your eyes forward, towards the direction of motion. Many of the new riders commit a big mistake and look down at their toes, which may result in an accident. Start pushing off with your foot other than the dominant one. The dominant foot is still on the ground until the rider is ready to push.
Push off in the opposite direction gently. As you’re a beginner, take slow and progressive pushes. Perceive the pleasure of riding and grow your confidence. Do a couple of quick pushes and balance better control until you attain a comfortable speed that permits the scooter to drift without jiggling. Once you’ve picked up speed, move your dominant foot onto the scooter and turn it behind the other feet 90 degrees, like riding a skateboard. That’s the whole point where you learn how to balance a kick scooter while riding.
Foot Switching
Beginner scooter riders have the tendency to implant the same supporting foot on the deck during the whole ride. This could be “OK,” but riding without foot switching can cause severe exhaustion. So, if you want to enjoy a comfortable long ride, then it’s better to get adept at the foot switching/switch kicking at the beginning. Switch kicking is a technique that empowers the rider to switch the dominant foot with the other to prevent fatigue and enjoy a balanced workout.
Switching the feet may seem the most difficult thing, but it’s an easy task in its nature. You’ll soon get used to it.
Gliding Posture
When your kick scooter has attained a maintainable rolling, you fancy freewheeling. For this purpose, lift off your action leg and swiftly place it at the heel of the dominant foot. The action leg must be relaxing on the deck in this position without stepping on the rear fender brake. This sliding posture ameliorates overall balance, keeping the master and pushing legs close to each other.
Before bringing your pushing leg down into a comfortable position to touch the ground, swing it up and forward in a pancake-like motion. Return to the glide position after making continuous pushes.
Also Read: How to make a kick scooter faster.
FAQs
1- How do you get over the fear of dropping in a scooter?
You can overcome the fear of dropping from a kick scooter by maintaining low speeds, riding over plain surfaces, and practicing continuously.
2- Is a kick scooter tiring?
A kick scooter is only suitable for short distances (maximum 2 miles). For longer distances, the kick scooter may become pretty tiring.
3- What is the fear of scooters called?
The fear of riding scooters is called scooterphobia.
The Verdict – How to Ride a Kick Scooter
We’ve left no stone unturned to provide you with a complete guide on “how to ride a kick scooter.” The tips and guidelines outlined here will make you ride like a pro and make your commuting safe and enjoyable. The main thing to remember is to always take a start with smooth and easy pushes and then improve your pace as your confidence boosts.
Happy Learning and Safe commuting!
